I haven't been able to watch such a good movie lately. I think this movie is going to be a cult movie and it's a really great work and the acting is at the highest level and the subject is really immersive. Each of them has their own style and charisma. Each of them delivers a terrific performance. Some people said we had trouble understanding and I think they might be right because the movie doesn't want low IQ and you shouldn't watch this movie while you're distracted and as I said Best new film I've seen in a while, thoroughly enjoyed it. Guy Ritchie has done an amazing job as always.
By the way, the soundtrack is very good too
here is one of them
Listen to the music man and go watch the movie. If a movie's soundtrack and cast is good, quality is inevitable. It deserves awards because movies like this are really hard to see these days. Anyway, there is no need to talk too much. Sit back and enjoy the movie.
Storyline
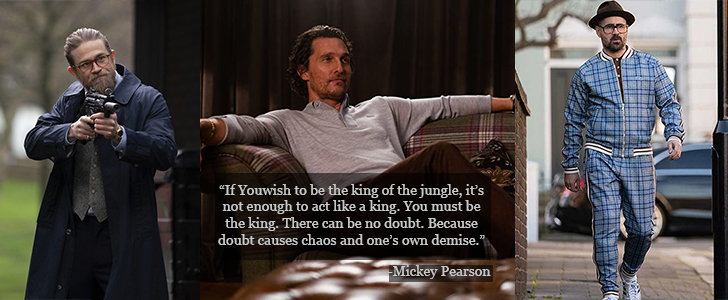
A talented American graduate of Oxford, using his unique skills, and audacity, creates a marijuana empire using the estates of impoverished British aristocrats. However, when he tries to sell his empire to a fellow American billionaire, a chain of events unfolds, involving blackmail, deception, mayhem and murder between street thugs, Russian oligarchs, Triad gangsters and gutter journalists.
Genres: Action, Comedy, Crime
Actors: Matthew McConaughey, Charlie Hunnam, Michelle Dockery
We use the email sending process frequently in any web application. Sending mail with ASP.NET Core MVC is really simple. What we need to do is add class to Models folder and add controller to our controllers folder. After writing a few code, our process will be finished.
We add Email class to the models folder.
namespace onurtaskiran.Models
{
    public class Email
    {
        public string To { get; set; }
        public string Subject { get; set; }
        public string Body { get; set; }

    }
}
we use the "System.Net.Mail" namespace. Yes don't forget to add it.
using Microsoft.AspNetCore.Mvc;
using onurtaskiran.Models;
using System.Net.Mail;

namespace onurtaskiran.Controllers
{
    public class MailController : Controller
    {
        public IActionResult Index()
        {
            return View();
        }

        [HttpPost]
        public IActionResult Index(Email em)
        {
            string to = em.To;
            string subject = em.Subject;
            string body = em.Body;
            MailMessage mm = new MailMessage();
            mm.To.Add(to);
            mm.Subject = subject;
            mm.Body = body;
            mm.From = new MailAddress("onurtaskiran@gmail.com");
            mm.IsBodyHtml = false;
            SmtpClient smtp = new SmtpClient("smtp.gmail.com");
            smtp.Port = 587;
            smtp.UseDefaultCredentials = true;
            smtp.EnableSsl = true;
            smtp.Credentials = new System.Net.NetworkCredential("onurtaskiran@gmail.com", "password");
            smtp.Send(mm);
            ViewBag.message = "Your email has been sent successfully";
            return View();
        }
    }
}
Include the HTML page in our project and edit it as in the code
You may get gmail security errors. Does not allow your Gmail account to be used by an external application. If you want to send mail, you must disable secure application access.
This movie is one of my favorite movies. I watched last night.I don't know why I didn't watch it when it first came out. A very, very good movie. I strongly recommend you to watch. Logan Marshall-Green performed well. That man is similar to Tom Hardy. I think this two men very good stars.
The film shows what can be done with artificial intelligence. Can artificial intelligence bring the end of humanity? raises the question. I think artificial intelligence will not end humanity because it is not a mind. Human mind overcomes everything. you underestimate the human mind. However, it is the human mind that creates all kinds of technology. Human mind is everything. is the only way to survive and live. Artificial intelligence can think like a human, but man somehow finds his way. What they said I will either find a way or make one. The end of the movie is surprise. You should watch the movie
About the movie:
Set in the near-future, technology controls nearly all aspects of life. But when the world of Grey, a self-labeled technophobe, is turned upside down, his only hope for revenge is an experimental computer chip implant.
Who would win? Of course, I cannot answer easily. Most people will say that Muhammad Ali will win. But if we look logically, is this the case? Muhammad Ali has an advantage in terms of speed and Mike Tyson has an advantage in terms of power. I think they're both the best boxers of all time... When they asked Muhammad Ali about this, he said Mike wins. Mike said that Ali will win. I guess I would never want such a fight to happen. Muhammad Ali has a great character and all people love him so is Mike Tyson. I think if these two great boxers had a match, Mike would have won. In my opinion, contrary to popular belief, Muhammad Ali could not have won the match. Mike would be the winner by knockout. In a fight, anything can happen, but I say that Muhammad Ali would have lost this match, although I would admit that it was the best. Such men will never be born again. Mike is still a living legend.
If you are trying to run Docker for Windows within a virtual machine, you need to enable 'Nested Virtualization'. You need to upgrade your windows to the latest version and you also need to enable virtualization in BIOS. I used docker for the first time a few days ago and got an error. Even though I did virtualization, I kept getting errors.
Unable to find image 'xxxx' locally
First of all, I installed the docker on my computer and then I marked the containers and Hyper-V features. so i got an error then I deleted docker completely and did the virtualization. so the error was fixed.
So what will we do, here is the simple solution
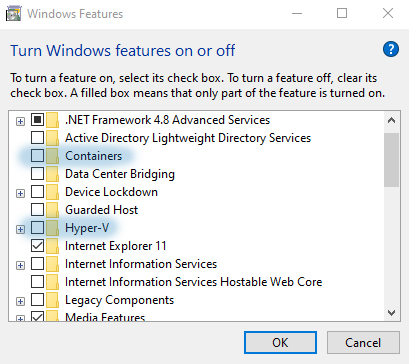
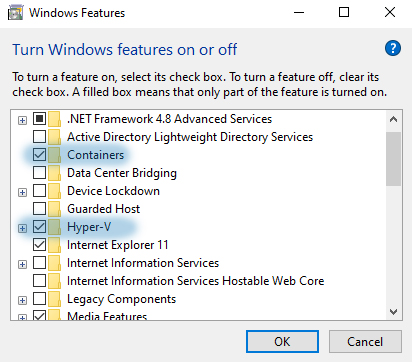
Open "Turn windows features on or off" from Control Panel
Remove the selections from containers and Hyper-V
Restart the computer
Mark the containers and Hyper-V features as selected
What are we gonna do, first of all, a home page will greet us with a welcome. We will have two buttons named register and login. When you click Register, our registration page will come up asynchronously. At the same time, when you click login, our login page will open in the same way. When logged in, the navbar will write a welcome user and there will be a logout button. Let 's do it
Angular versions: Angular 11, 10, 9, 8, 7, 6, 2/5
User Model
Path: /src/app/_models/user.ts
We define a small class that defines the properties of a user.
export interface User {
  username: string;
  token: string;
}
Account Service
Path: /src/app/_services/account.service.ts
Here we perform the methods for login, logout, and registration, and the standard methods for retrieving and modifying user data.
import { HttpClient } from '@angular/common/http';
import { Injectable } from '@angular/core';
import { ReplaySubject } from 'rxjs';
import {map} from 'rxjs/operators';
import { User } from '../_models/user';

@Injectable({
  providedIn: 'root'
})
export class AccountService {
  baseUrl = 'https://localhost:5001/api/';
  private currentUserSource = new ReplaySubject<User>(1);
  currentUser$ = this.currentUserSource.asObservable();

  constructor(private http: HttpClient) { }

  login(model: any) {
    return this.http.post(this.baseUrl + 'account/login', model).pipe(
      map((response: User) =>{
        const user = response;
        if (user) {
          localStorage.setItem('user',JSON.stringify(user));
          this.currentUserSource.next(user);
        }
      })
    )
  }

  register(model: any) {
    return this.http.post(this.baseUrl + 'account/register', model).pipe(
      map((user: User) => {
        if (user) {
          localStorage.setItem('user', JSON.stringify(user));
          this.currentUserSource.next(user);
        }
      })
    )
  }

  setCurrentUser(user:User) {
    this.currentUserSource.next(user);
  }

  logout() {
    localStorage.removeItem('user');
    this.currentUserSource.next(null);
  }
}
Home Component Template
Path: /src/app/home/home.component.html
what will we do here, first of all We welcome the client with a welcome message and send them to the login or registration form.
We transfer this process to the registration form with the *ngIf="registerMode" code or send it to the login form with the *ngIf="loginMode" code.
<div class="container mt-5">
  <div *ngIf="!registerMode && !loginMode" style='text-align: center;'>
    <h1>Welcome to My WebSite</h1>
     <p class="">All you need to do is sign up! or log in</p>

     <div class="text-center">
      <button (click)="registerToggle()" class="btn btn-primary btn-lg mr-2">Register</button>
      <button (click)="loginToggle()" class="btn btn-info btn-lg">Login</button>
     </div>
  </div>

    <div *ngIf="registerMode" class="container">
      <div class="row justify-content-center">
        <div class="col-4">
          <app-register (cancelRegister)="cancelRegisterMode($event)"></app-register>
        </div>
      </div>
    </div>

    <div *ngIf="loginMode" class="container">
      <div class="row justify-content-center">
        <div class="col-4">
          <app-login (cancelLogin)="cancelLoginMode($event)"></app-login>
        </div>
      </div>
    </div>

</div>
Home Component
Path: /src/app/home/home.component.ts
Here we are just creating a method called register toggle. The only purpose of this function is to take our registered and set it to the opposite of lists
import { Component, OnInit } from '@angular/core';
import { Observable } from 'rxjs';
import { User } from '../_models/user';
import { AccountService } from '../_services/account.service';

@Component({
  selector: 'app-nav',
  templateUrl: './nav.component.html',
  styleUrls: ['./nav.component.css']
})
export class NavComponent implements OnInit {
  model: any = {}

  constructor(public accountService: AccountService) { }

  ngOnInit(): void {
  }

    logout() {
    this.accountService.logout();
  }

}
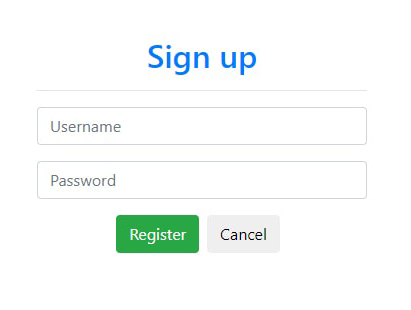
Register Component Template
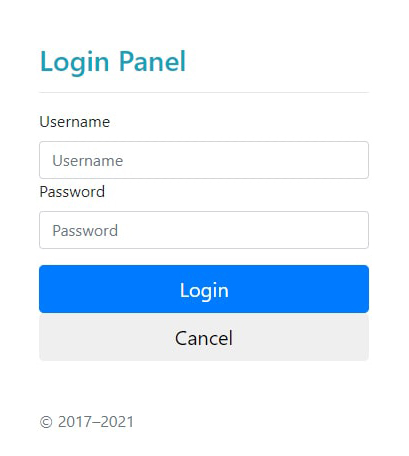
Path: /src/app/register/register.component.html
The registration component template includes a simple registration form with username and password fields. We send username with [(ngModel)]="model.username" code and [(ngModel)]="model.password" code and user password to the registration form.
The application routing module defines the top-level routes for angular application and creates a root routing module by forwarding the path sequence to the RouterModule.
import { NgModule } from '@angular/core';
import { RouterModule, Routes } from '@angular/router';

const routes: Routes = [];

@NgModule({
  imports: [RouterModule.forRoot(routes)],
  exports: [RouterModule]
})
export class AppRoutingModule { }
App Component Template
Path: /src/app/app.component.html
This component is the root component template for the application. It includes the main navigation bar, which is displayed only for authenticated users, and a general alert component, as well as a redirector output component to display the contents of each view according to the current path.
The main index.html file is this file. It is the first page that started everything. Angular CLI gathers all compiled javascript files and injects them there
It is the entry point where the application is launched and preloaded by angular.
import { enableProdMode } from "@angular/core";
import { platformBrowserDynamic } from "@angular/platform-browser-dynamic";

import { AppModule } from "./app/app.module";
import { environment } from "./environments/environment";

if (environment.production) {
  enableProdMode();
}

platformBrowserDynamic()
  .bootstrapModule(AppModule)
  .catch((err) => console.error(err));
Polyfills
Path: /src/polyfills.ts
This file is created automatically by the Angular CLI when creating a new project with the ng new command, and also allows the App to run on all major browsers.
import "zone.js/dist/zone";
Npm package.json
Path: /package.json
Package.json file, package dependencies installed with npm and npm start or npm run build etc. contains information about scripts.
Websites made without cache can cause speed problems. An event called cache is the caching process. This is very suitable for speeding up your php pages. We can make our php pages that need to be faster with easy and efficient codes
I only serve two php pages. The first is t-cache.php and the other is b-cache.php you can give different names.
As you can see, our code is simple, the first five lines create the html file in the name of our php file. For example, if I am using tonur.php file, it creates an html page named cached-tonur.html.
Do we have files in our later codes? Is not there? It does not run any php code if any. if not, it creates our cache file.
Let's add the codes to our b-cache.php page.
// import content to a file
$cached = fopen($cachefile, "w");
fwrite($cached, ob_get_contents());
fclose($cached);
ob_end_flush(); //send to browser
If our file is not found here, this code is executed. All of the php page is sent to the browser instead of working.
Yes now we are calling to our main php file with include as below.
include("top-cache.php");

// Your website codes

include("bottom-cache.php");
It is one of the best TV series I've seen. The plot of the TV series is very well edited. I think its value is not understood. But it doesn't matter. This doesn't change the fact that the Tv series is good. The character in the series is a man like Arsen Lupen. This Tv series shows what a man who hit rock bottom can do. There is a lot of action in every episode and has a great story, very good at acting.
Watching only the first episode is enough to understand the quality of the series.
The soundtrack of the series is also good. It is their music that makes such things beautiful.
here is one of them
About the TV Series:
An ex-con assumes the identity of a murdered sheriff in the small town of Banshee, Pennsylvania, where he has some unfinished business.
Creators: David Schickler, Jonathan Tropper
Stars: Antony Starr, Ivana Milicevic, Ulrich Thomsen
Set file paths to yourself. I named my page with html codes meta.php, I named my page with php codes as metas.php Database connection is made with connection.php in the include folder meta.php is located inside the admin folder. Pictures are taken to the upload folder. Upload folder is outside the admin folder When I say $new_name="../upload/" I say go out from the admin folder, go to the upload folder, upload the image...
Tables
meta -
  id -
  model_name -
  model_code -
  stock_status -
  new_product -
  showcase -
  status;
product_images
-id - meta_id - image_url - row - status;
I save the id of the meta table to the meta_id of the product_images table
Slider is the showcase of a website. So it is necessary to understand the logic well. There are many sliders we use on websites. We can use jquery, but we need to understand its logic with javascript.
I have been developing projects with javascript recently. Here is a slider application I have coded. The pictures change at the specified interval of seconds or change them with the arrow keys, also each slider has its own name and website.
First, let's code it to be changed only with the arrow keys
var models = [
  {
    name: "Apple",
    image: "img/apple.jpg",
    link: "https://www.apple.com/",
  },
  {
    name: "Ibm",
    image: "img/ibm .jpg",
    link: "https://www.ibm.com",
  },
  {
    name: "Microsoft",
    image: "img/microsoft .jpg",
    link: "https://www.microsoft.com",
  },
  {
    name: "Philips",
    image: "img/philips.jpg",
    link: "https://www.philips.com",
  },
  {
    name: "Samsung",
    image: "img/samsung.jpg",
    link: "https://www.samsung.com",
  },
];

var index = 0;
var slaytCount = models.length;
var settings = {
  duration: "3000",
  random: true,
};

ShowSlide(index);

document
  .querySelector(".fa-arrow-circle-left")
  .addEventListener("click", function () {
    index--;
    ShowSlide(index);
    console.log(index);
  });

document
  .querySelector(".fa-arrow-circle-right")
  .addEventListener("click", function () {
    index++;
    ShowSlide(index);
    console.log(index);
  });

function init(settings) {
  setInterval(
    function () {
      if (settings.random) {
        index = Math.floor(Math.random() * slaytCount);
      } else {
      }
    },
    settings,
    duration,
  );
}

function ShowSlide(i) {
  index = i;

  if (i < 0) {
    index = slaytCount - 1;
  }
  if (i >= slaytCount) {
    index = 0;
  }

  document
    .querySelector(".fa-arrow-circle-right")
    .addEventListener("click", function () {});

  document.querySelector(".card-title").textContent = models[index].name;

  document
    .querySelector(".card-img-top")
    .setAttribute("src", models[index].image);

  document.querySelector(".card-link").setAttribute("href", models[index].link);
}
Now, let's send it forward at the interval of seconds we set.
var models = [
  {
    name: "Apple",
    image: "img/apple.jpg",
    link: "https://www.apple.com/",
  },
  {
    name: "Ibm",
    image: "img/ibm .jpg",
    link: "https://www.ibm.com",
  },
  {
    name: "Microsoft",
    image: "img/microsoft .jpg",
    link: "https://www.microsoft.com",
  },
  {
    name: "Philips",
    image: "img/philips.jpg",
    link: "https://www.philips.com",
  },
  {
    name: "Samsung",
    image: "img/samsung.jpg",
    link: "https://www.samsung.com",
  },
];

var index = 0;
var slaytCount = models.length;
var interval;

var settings = {
  duration: "3000",
  random: false,
};

init(settings);

document
  .querySelector(".fa-arrow-circle-left")
  .addEventListener("click", function () {
    index--;
    ShowSlide(index);
    console.log(index);
  });

document
  .querySelector(".fa-arrow-circle-right")
  .addEventListener("click", function () {
    index++;
    ShowSlide(index);
    console.log(index);
  });

document.querySelectorAll(".arrow").forEach(function (item) {
  item.addEventListener("mouseenter", function () {
    clearInterval(interval);
  });
});

document.querySelectorAll(".arrow").forEach(function (item) {
  item.addEventListener("mouseleave", function () {
    init(settings);
  });
});

function init(settings) {
  var prev;
  interval = setInterval(function () {
    if (settings.random) {
      do {
        index = Math.floor(Math.random() * slaytCount);
      } while (index == prev);
      prev = index;
    } else {
      if (slaytCount == index + 1) {
        index = -1;
      }
      ShowSlide(index);
      console.log(index);
      index++;
    }

    ShowSlide(index);
  }, settings.duration);
}

function ShowSlide(i) {
  index = i;

  if (i < 0) {
    index = slaytCount - 1;
  }
  if (i >= slaytCount) {
    index = 0;
  }

  document
    .querySelector(".fa-arrow-circle-right")
    .addEventListener("click", function () {});

  document.querySelector(".card-title").textContent = models[index].name;

  document
    .querySelector(".card-img-top")
    .setAttribute("src", models[index].image);

  document.querySelector(".card-link").setAttribute("href", models[index].link);
}